Pencil Drawing Tutor banner showing a photorealistic pencil sketch and a graphite pencil grade scale from 9H to 14B. Pencil Tutor drawn girl Jasmina Susak artist holding pencil smiling Pencil Drawing Tutor logo with text 'Learn to Draw with Photorealism' and a graphite pencil value scale.

How to Draw Realistic Pencil Drawings with Graphite and Charcoal

Hyper-realistic eye drawing tutorial with long eyelashes, showing graphite pencil shading and a grayscale value chart. Step-by-step graphite pencil drawing of realistic short hair textures and flyaways with a shading reference chart. Step-by-step tutorial on how to draw realistic water droplets on toned gray paper with a white charcoal pencil. Realistic nose dark skin drawing tutorial showing graphite pencil shading techniques and a value scale from 2H to 6B. Realistic pencil drawing of an eye with a 2H to 9B value scale, graphite pencils, and pencil shavings on the paper. Four-step butterfly drawing tutorial showing the progression from a simple outline to a realistic shaded monarch butterfly. Realistic graphite pencil drawing of lips with a 5-step shading value scale and an eraser on the paper. Realistic graphite pencil drawing of a horse with heart-shaped swatches showing the use of 2H, H, HB, 4B, and 9B pencils. Pencil drawing of a realistic hair curl with a vertical 7-step shading value scale and two graphite pencils. A 4-step graphite pencil tutorial showing how to draw realistic olives from initial sketch to final shading. Graphite pencils around the realistically drawn ear and hair. Close-up graphite pencil drawing of a realistic eye with long eyelashes and detailed iris shading by Jasmina Susak.

Easy Step-by-Step Pencil Drawing Tutorials for All Skill Levels

Pencil Drawing Tutor is an online learning platform where you can learn realistic pencil drawing using graphite and charcoal. Our step-by-step pencil drawing tutorials teach you how to draw from reference photos and from scratch, with a strong focus on realism, shading, and structure. We provide drawing ideas and techniques to make your drawings lifelike and beautiful.


Join us for hand-drawn art tutorials that will help you capture realistic details and create your own masterpiece. Learn from our experienced teacher Jasmina Susak, who has guided countless students to success.

Realistic black swan reference photo and pencil drawing comparison showing 2B, HB, and 9B graphite pencil swatches.
Step by step Pencil Tutorial how to Draw an eye
Side-by-side comparison of a metallic spoon reference photo and a realistic graphite pencil drawing demonstrating reflective textures.

What You Will Learn:

  • Draw from reference photos and imagination
  • Make your drawings look like photos
  • Draw people, animals, objects, landscapes, and plants
  • Create realistic textures: glass, feathers, fur, wood, silk, metal, and more
  • Shade and blend lifelike skin tones
  • Study hair of all colors and styles
  • Draw on grey paper to make your highlights pop
  • Create smooth, seamless gradients
  • And much more!


What You Get as Subscriber:

  • Over 100 hours of full-length, real-time drawing videos - every step included, no skipping or speeding up.
  • Free 24/7 access to PenPick, the graphite color picker app for artists. Upload photos and get pencil suggestions for any area.
  • Tips, tricks, and detailed demonstrations to improve your skills quickly.
  • Guidance on blending, pencil selection, and choosing the best art materials.
  • Photorealistic drawing techniques with advice on what works and what to avoid.
  • Printable pencil outlines and high-resolution reference images.
  • Step-by-step written tutorials with clear images to follow along.
  • Control your pace - pause, replay, and practice as needed.
  • Cancel or switch subscription plans anytime - no commitments.
  • New tutorials added WEEKLY.
  • Direct feedback and personal support from the artist, Jasmina Susak.
Step by step Pencil Tutorial how to Draw an eye
drawing eyes watermelon ladybug giraffe landscape draw every subject

How to Draw Anything - Tutorials on Everything for Everyone

On many websites you will find only specific topics, like how to draw people or how to draw for beginners. Here, we teach how to draw everything, and we have tutorials for every skill level, for kids and adults.


You will find step-by-step tutorials on:

  • how to draw animals
  • how to draw people, portraits, and faces
  • how to draw everyday objects
  • how to draw plants and flowers
  • how to draw fruits and vegetables
  • how to draw in 3D
  • how to draw in negative (inverted drawings)
  • how to draw landscapes
  • how to draw textures and patterns
  • and more

We’ve covered everything you need to learn how to draw, all in one place. Join our creative community. As a member, you can interact with other artists, post your drawings, and suggest new drawing ideas you’d like us to create tutorials for.


New Drawing Tutorials Every WEEK!

With a brand new drawing tutorial added every week, our tutorial catalogue and creative community are growing fast! Each lesson is split into easy-to-follow parts, designed to help you master new techniques and improve your skills in realistic pencil drawing.


Browse through all the available pencil drawing tutorials and join our growing community to start creating your own masterpieces, guided by Jasmina Susak.


Subscribe to our newsletters in the form at the bottom of this site to get notified every time we post a new tutorial.


Realistic pencil drawing examples of a rose, cherry, olives, avocado, and billiard ball demonstrating different shading techniques.
red ribbon with the NEW word on it

Choose Your Membership Plan

$19 / Month

  • Ideal for those who prefer flexibility.
  • Pay on a month-to-month basis.
  • Cancel anytime with no long-term commitment.
  • Access to new tutorials as they are released.

$299 / Lifetime Access

  • Best value for long-term enthusiasts.
  • Pay once for unlimited access.
  • No recurring payments.
  • Access to new tutorials as they are released.

Cancel any time. Read our Privacy Policy and Terms of Use. Have a question? Contact us


Access to PenPick Graphite

As our student, you'll get access to PenPick Graphite, a unique Color Picker for Artists.


This web app lets you upload your own reference photos. Simply click/tap on the image, and PenPick will suggest the perfect pencil to use (from 9H to 14B). Find out more on the website: www.pen-pick.com


graphite pencil color picker web application help beginner artists showing which pencil to use for selected area of reference phoro of an eye.
Pencil drawing tutorial examples of a rope braid, ponytail, and flowing hair styles demonstrating realistic highlights and shading.

Yes, you can draw hair!

We teach you the simplest, easiest way how to draw hair. We’ve created a collection of step-by-step tutorials on drawing hair, and we keep adding new tutorials regularly. We provide tips and ideas for drawing realistic hair that even absolute beginners can draw by breaking down complex textures into manageable steps.


  • Step 1: How to draw hair outlines (downloadable pencil sketch included)
  • Step 2: How to draw hair values and basic shapes
  • Step 3: How to draw hair details and flyaway hairs

For example, our instructor Jasmina Susak drew the hair strand on the right in this image in only 15 minutes. You can watch the full, narrated video where every step is explained with nothing cut out.


Photorealistic graphite pencil drawing of a fuzzy bumblebee with vertical and horizontal shading value scales.

Easy Realistic Pencil Drawing Tutorials

Many people believe they can't draw and don't even try. Others face challenges and struggle to get the results they want, eventually giving up. But with the right guidance and tutorials, anyone CAN draw. It's not about talent. The point is: some people need more time to reach a certain level, while others get there faster.


With our tutorials, you can start with simple lessons that even kids can do. Then, step by step, you'll progress to more detailed drawings and enjoy watching yourself improve. This is when you'll start to feel truly motivated.


Learn to Draw a Photorealistic Elephant

Basic Outlines Drawing Elephant Skech Step 1

Basic Outlines

Discover the power of accurate outlines that lay the foundation for photorealistic and captivating drawings.


Creating Shadows with graphite Step 2

Deepest Shadows

Craft depth and dimension through skillful application of the darkest elements.


Making Shading and Highlights Step 3

Shading & Highlights

Enhance your artwork by incorporating mid-tones and highlights for a broader range of values.


Adding Details for Realism Step 4

Details for Realism

Perfect the art of adding intricate details, achieving a remarkable level of realism.


Four-quadrant graphite pencil drawing showing textures of wood grain, woven fabric, checkered Gingham patterns, and chocolate blocks.

Why Drawing Is Great at Any Age

Our art instructor, Jasmina Susak, believes in the transformative power of art. She encourages everyone to explore their capabilities, develop self-discipline, and even improve their health through drawing.


We offer step-by-step tutorials for drawing patterns and textures like these, helping you improve control, muscle memory, and patience, and serving as a warm-up even for experienced artists.


So, how drawing can benefit you:


  • Good for mind and body: Drawing has a healing power by helping you forget everyday worries. When you draw, you focus and relax, paying attention only to your project, which reduces stress and helps with many physical and emotional challenges.
  • The Importance of Learning: Art is a journey of constant learning, and it’s never too late to start. Learning and developing skills, whether in art or anything else, is what has made us human, helped us evolve, survive, and thrive.
  • Patience and self-discipline: The act of drawing helps develop important skills like diligence, persistance, self-control and determination - qualities that improve both your art and daily life.

Posterize Image Online Free Tool

Add Posterize Effect to Reference Photos


When drawing from reference photos, artists often posterize images to break values into clear levels. Posterizing helps you see how light and shadow relate to each other, define the forms of the drawing subject, and clearly distinguish highlights from the deepest shadows. This makes it much easier to choose the right pencils for shading and to build realistic values in pencil drawings.


Our Posterize Image Online Free Tool converts your uploaded photo to black and white and lets you choose the number of posterize levels. With 2 levels, your image becomes pure black and white. Adding more levels introduces gray values between black and white. The more levels you choose, the more value detail you can use when drawing and shading from your reference photo.


  1. Upload your photo.
  2. Choose the number of posterize levels.
  3. Click or tap the download button to save your posterized image, which is downloaded in the same size as your uploaded photo.

Tip: Our instructor Jasmina Susak usually chooses 7 posterize levels, as it provides a good balance between clear value separation and enough detail for realistic drawing. Bonus Tip: Posterize your drawing too. Set the scale to the same value as your reference photo. This will help you see whether your values match those in the image you are drawing from.


No registration. No ads. No cookies. We don’t see or collect your images. Everything happens in your browser. Read our Terms of Use. Have a question or suggestion? Contact us


Highlight & Shadow Isolator Online Free Tool

Shadows ◀︎   0   ▶︎ Highlights
Value: 0

Free Value Analysis Tool for Artists


When drawing from reference photos, artists need to figure out where the darkest shadows and the brightest highlights are. By mapping out these extreme values, you understand how much shading to apply and where to erase, making sure your drawings are shaded correctly. This makes it easier to create shadows, build artistic contrast, and place highlights accurately, because there is a difference between highlights that we often can’t distinguish properly. This tool makes these differences visible and easy to notice.


Why this tool is perfect for drawing


Artists often ask:


  • Where are my deepest shadows?
  • How do I know which highlight is the brightest?
  • Am I over-shading the midtones?
  • Should I darken this area a bit more?

This tool solves these issues, so artists find clear answers to all their questions and doubts while drawing. Use it any time, in any browser, on any device, with no registration required. We don’t see or store your images. This free online tool works directly in your browser. Read our Terms of Use. Have a question or suggestion? Contact us.


Pro-Tip: Use this tool to analyze your scanned drawings as well. Compare them with your reference photo downloaded at the same scale value to see how accurately you shaded and placed the highlights in your image.


All About Pencils and Drawing Techniques

How to draw a realistic cat face with pencil, step-by-step tutorial for beginners

Graphite Pencils

When it comes to graphite pencils, most brands are more or less the same - whether it's Staedtler, Koh-I-Noor, Caran d'Ache, Prismacolor, Faber-Castell, Derwent, etc. However, we highly recommend Matt Graphite Pencils by Faber-Castell because their newly developed graphite doesn’t shine like traditional graphite, which has always been a common problem for artists. Plus, they’ve added grades up to 14B, compared to the usual maximum of 9B. This allows artists to create deep, rich black tones that look like charcoal. (See the accompanying drawing of a Ragdoll Cat, done entirely with Matt graphite pencils.)


We are not promoted or affiliated with Faber-Castell; this is simply our heartfelt recommendation and the pencils our instructor uses throughout the tutorials on this website.


Paper, Blenders, and Other Tools

The quality of materials is very important - for making your drawings look better and for enjoying the process. Graphite and charcoal don't require expensive supplies, so treat yourself with high-quality tools for easier, more satisfying results. Here are some essentials:


  • Paper: Using thick, good-quality paper is important because thin printer paper wrinkles under pencil pressure and can tear when erased. So, paper weighing a minimum of 80 lb (118 g/m²) is ideal for any medium and makes drawing more enjoyable.
  • Erasers: Soft/dark pencils are hard to erase. Electric erasers work well for small areas, and erasers in pencils are handy. A kneaded eraser is also a must-have.
  • Tools for highlights: When erasers can't completely remove the shades, opaque white markers and gel pens are great for creating highlights over drawn areas. You can easily draw, e.g., animal whiskers or shiny effects (see accompanying demonstration).
  • Other tools: Many more tools can make your work easier and faster. To learn more and discover which "magical" tool our instructor uses to make animal fur fluffy, join us and explore all the art materials for drawing.

10 Quick Tips to Improve Your Drawing Skills

  1. Practice daily: Even 10–15 minutes a day helps build muscle memory.
  2. Use basic shapes: Break complex subjects into circles, squares, and lines.
  3. Vary your line weight: Thin, light lines for details; bold strokes for emphasis.
  4. Flip your drawing: Looking at it in reverse helps spot mistakes.
  5. Focus on proportions: Use guidelines to keep your drawings accurate.
  6. Use different pencils: Hard pencils (H) for sketching, soft pencils (B) for shading. Don't be afraid to use a 9B pencil to create depth in your drawing.
  7. Take breaks and revisit your work: Fresh eyes help catch mistakes.
  8. Try different techniques: To find the drawing style that suits you best, experiment with different methods of sketching and shading.
  9. Don't rush: Work on one step at a time and focus on the process rather than how much is left.
  10. Become our student: With our tutorials, your improvement and motivation are guaranteed. Join us and take your drawing skills to the next level!


Click the button for a new challenge.
Come back tomorrow for a new pencil drawing idea.

Need ideas what to draw? Your free reference photo will appear here.
Reference Image

What to Draw and How to Stay Motivated


  • Use reference photos: Take pictures, search free images, or use our generator to get new drawing challenges.
  • One step at a time: Break your drawing tasks into manageable steps to avoid overwhelm and stay on track.
  • Compare your new drawings to old ones: Comparing your drawings to professionals can be discouraging. Focus on your own progress and see the difference with each new accomplishment. Don’t compare to others who draw worse than you either; this can make you settle for less when there’s still a lot of room to improve. Stay critical and be honest with yourself about how far you’ve come.
  • Practice daily: Even a short 10-minute drawing session can help you stay motivated and keep your creativity flowing. Longer breaks can lead to art block - a common challenge many artists face - so make drawing a daily habit.
  • Join our community: Share your work and get feedback from our tutor and members - it will push you to improve and stay excited about your art. join us and get countless drawing ideas and inspiration.

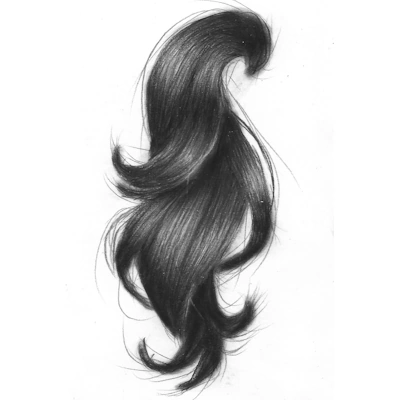
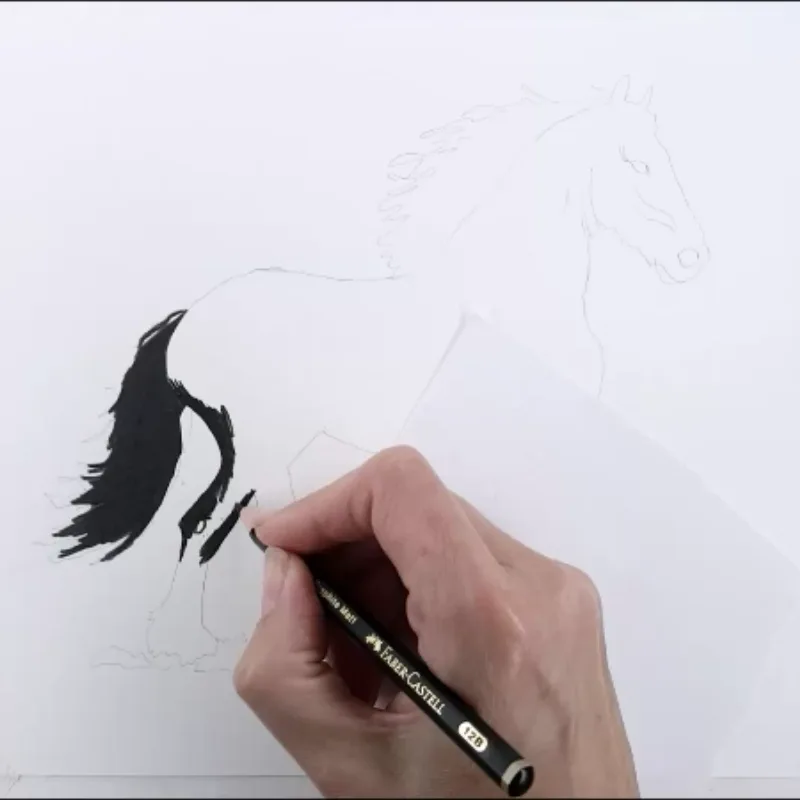
How to Draw Hair - Free Drawing Tutorial

Learn to Draw a Realistic Hair Strand - Easy Tutorial for Beginners

If you’ve ever struggled with drawing hair or making it look shiny, this exercise will help you reach that goal. You'll realize that drawing hair isn’t as difficult as it seems. This short and effective step-by-step guide will show you how to drastically improve your sketching skills within a few days. It’s an easy hair drawing method for the absolute beginners. So, where does a complete beginner start? Even if you’ve never drawn before, just follow the instructions in this 6-step tutorial and take your hair drawings to the next level.


Step 1: Mapping the Initial Hair Strokes with a 2B Pencil

Let’s draw a strand of hair that can be applied to any hairstyle, even curly hair. First, use a 2B pencil and create hair-like strokes from the top to midway and from the bottom to midway, as shown in the image below. Vary your pencil pressure to create a mix of thick and thin hair strands, and use both sharp and dull pencil tips for a more realistic texture. Add longer and shorter strokes to avoid a uniform look. Slightly lift off the pencil before reaching the area where you want the highlight to be. Each stroke should gradually disappear into the white of the paper, creating a smooth, natural fade. With just this technique, the strands already appear smooth and shiny, even at the earliest stage.

How to draw natural looking hair step 1

Step 2: Blending the Mid-Tones and Shaping Highlights

Next, blend the highlight using a blending stump. Lightly go over the ends of the pencil strokes and shade the highlighted area. Ensure no part of the hair clump remains white, but avoid making the highlight too dark. Follow the direction of the hair flow while blending.

Easy hair shading techniques step 2

Step 3: Layering with HB Pencils for Soft Textures

Now, use an HB pencil in the same way as you did with the 2B pencil. Lightly go over the areas drawn with the 2B, including a little bit of the highlights. When you go over the highlights, lift the pencil to avoid darkening them too much - they should remain brighter than the surrounding area. This will help soften the lines from the first step

Beginner friendly hair drawing guide step 3

Step 4: Adding Deep Contrast and Dimension with 6B Pencils

Create darker lines with a 6B pencil (or darker) to add depth, focusing on the outer edges of the lock — the bottom and top areas, but avoiding the middle where the highlights are. Start at the base of the lines, drawing short strokes inward, and finish them farther from the highlight by gently lifting the pencil. This will make the hairs gradually blend into the mid-tone. You can even use a 9B or 14B pencil for the darkest values. If you're drawing the whole hair (not just a single strand as in this tutorial), use the darkest pencils between the locks, where the hair receives less light, and the locks cast shadows on each other. Notice how the locks now appear more bent, thanks to the added depth from the darker values.

How to Draw hair Pencil Tutorials Drawing step 4

Step 5: Creating Realistic Highlights and Bright Flyaways

Use a precision knife to create lighter hairs, particularly in the middle over the highlight. You can also use white charcoal, a white fine-tip ink gel pen, or a Gelly Roll pen for this. If you overdo the highlighting, simply go over it with the pencils you’ve used to darken it. Next, add highlighted flyaways over the darker areas with quick, confident strokes. When drawing hair, always include flyaway hairs, especially around the head if you're creating a full portrait. This helps break the edge between the hair and the background.

Learn to Draw hair Tutor step 5

Step 6: Final Details with Natural Dark Flyaway Strands

As the final step, add some darker flyaways around the hair lock. Use well-sharpened HB and 2B pencils to create variation in the darker flyaways. Randomly place the tip of your pencil on the hair and, using rapid, sudden strokes, draw in any direction. Place the flyaways randomly, as hair moves naturally, and individual strands can appear anywhere. This technique will give the hair a more natural look.

Next task: Try drawing the locks with different shades. For example, start with a 4B instead of a 2B pencil, or begin with an H4 to create blonde hair.

How to Draw hair Pencil Tutorials Drawing step 6

And that’s it. If you’d like to draw more complex hair, you can explore our full collection of tutorials and join us to continue learning at your own pace.

Learn to Draw with Colored Pencils

Link to colored pencil tutorials


golden dragon colored pencil drawing tutorial cheetah colored pencil drawing tutorial portrait face colored pencil drawing tutorial leopard colored pencil drawing tutorial


facebook share button pencil picker Pin It colored pencil picker Share on Twitter pencil picker
Flag Counter